I came across this short video of some photography hacks...aka...cheap work arounds, and shortcuts.
It is not long...like only a few minutes. Worthwhile to visit.
http://www.iheartfaces.com/2014/08/7-simple-photography-hacks/

Saturday, August 30, 2014

Thursday, August 21, 2014
September Challenge...
"There is a crack in everything. That's how light gets in. - Leonard Cohen
It is hard to believe fall is just around the corner. It will be here before we know it. Our September challenge should be fun. It is taking a photo with artificial light. First, let me talk about what is NOT artificial light...that would be any light from the sun, moon, stars, or lightning. Artificial light is any light which originates from a non-natural source. It includes flash lighting, and continuous lighting such as incandescent or tungsten bulb, or fluorescent tubes. Flash lighting can be on camera or off camera, direct or indirect. It maybe further diffused by a modifier, or colored gels either to project a specific temperature of light, or a creative effect.
I do not claim to be an expert on using a flash. It is an area I wish to explore, and eventually conquer. I hope you will take this month to experiment, and learn more about your flash.
The pop-up flash of your cameras work, but they tend to give harsh light, and cast a shadow. If a pop-up flash is all you have...don't stress. There are ways to diffuse that light which I will talk about later. An external flash with a head that pivots can be used on camera, or off. Because the head pivots, light can be bounced off a ceiling, reflector, back or side wall to create a more flattering, softer look. More importantly an external flash can be taken off the camera completely to create directional light to add drama, or lighting effects.
There are many wonderful natural light photographers, but using a flash opens up all kinds of possibilities.
Reasons why to use a flash.
1. To use a lower ISO...flash can increase the amount of light falling on a subject, so the photographer can us a lower ISO keeping the image at a much higher quality. Remember, the higher the ISO, the greater the noise.
2. To freeze movement...there are some lighting situations where even at your highest ISO, you can't get a shutter speed high enough to freeze movement of your subject. Therefore, you need to be able to increase light on your subject, giving you the ability to use a faster shutter speed.
3. To create a more flattering light for your subject...whether you are facing a poorly lit reception hall or restaurant, or the harsh sunlight at mid-day, using your flash can help create a more flattering directional light. Everyone wants to be flattered when they are being photographed.
4. To balance a backlit situation...when you're photographing a backlit subject with only natural light, you have to choose whether you want the subject or background to be exposed correctly. You will lose one, or the other because you can't balance the light. However, with a flash you can balance a dark foreground with a bright background, allowing you to capture both in one well exposed image.
5. To increase your creative ability as a photographer... a flash can be used for creative effects, such as combining a crisp action shot followed by a trail of motion blur. Using colored gels on flash will change the mood of an image and add drama. It can spot light the main subject making it pop from the environment.
I will be posting more information about using a flash, but there is no way to cover all aspects in a blog. My hope is that this little bit of information will cause you to try some new things, experiment, and explore. We only learn if we try.
I will send out emails as I post new information. Do not fret if you do not have an external flash. There are ways to make an on camera flash better.
The challenge: Experiment with using any form of artificial light to capture a photograph. Most will be in the form of a flash, but other sources of light are: an iPhone, iPad, flashlight, candle, incandescent, tungsten, florescent, glow sticks, and street light. I am sure I have left some out, but you get the idea
Rules:
1. Photos must be taken from August 21- September 18...in other words, no archives.
2. Submit no more than 3 photos in any format, or size.
3. If you have done some special post processing...explain.
4. Know your aperture, shutter speed, and ISO.
5. Have fun.
I hope we have a lot of participants in the challenge.
Here are some examples to help you get your creative juices flowing.


I hope these photos give you some great ideas. Several years ago, Rey did a workshop with colored gels...get them out, put them on your flash, and see how they can enhance your pictures. This is a month for you to try out, and learn a little bit about flash photography. Go out an get clicking.
It is hard to believe fall is just around the corner. It will be here before we know it. Our September challenge should be fun. It is taking a photo with artificial light. First, let me talk about what is NOT artificial light...that would be any light from the sun, moon, stars, or lightning. Artificial light is any light which originates from a non-natural source. It includes flash lighting, and continuous lighting such as incandescent or tungsten bulb, or fluorescent tubes. Flash lighting can be on camera or off camera, direct or indirect. It maybe further diffused by a modifier, or colored gels either to project a specific temperature of light, or a creative effect.
I do not claim to be an expert on using a flash. It is an area I wish to explore, and eventually conquer. I hope you will take this month to experiment, and learn more about your flash.
The pop-up flash of your cameras work, but they tend to give harsh light, and cast a shadow. If a pop-up flash is all you have...don't stress. There are ways to diffuse that light which I will talk about later. An external flash with a head that pivots can be used on camera, or off. Because the head pivots, light can be bounced off a ceiling, reflector, back or side wall to create a more flattering, softer look. More importantly an external flash can be taken off the camera completely to create directional light to add drama, or lighting effects.
There are many wonderful natural light photographers, but using a flash opens up all kinds of possibilities.
Reasons why to use a flash.
1. To use a lower ISO...flash can increase the amount of light falling on a subject, so the photographer can us a lower ISO keeping the image at a much higher quality. Remember, the higher the ISO, the greater the noise.
2. To freeze movement...there are some lighting situations where even at your highest ISO, you can't get a shutter speed high enough to freeze movement of your subject. Therefore, you need to be able to increase light on your subject, giving you the ability to use a faster shutter speed.
3. To create a more flattering light for your subject...whether you are facing a poorly lit reception hall or restaurant, or the harsh sunlight at mid-day, using your flash can help create a more flattering directional light. Everyone wants to be flattered when they are being photographed.
4. To balance a backlit situation...when you're photographing a backlit subject with only natural light, you have to choose whether you want the subject or background to be exposed correctly. You will lose one, or the other because you can't balance the light. However, with a flash you can balance a dark foreground with a bright background, allowing you to capture both in one well exposed image.
5. To increase your creative ability as a photographer... a flash can be used for creative effects, such as combining a crisp action shot followed by a trail of motion blur. Using colored gels on flash will change the mood of an image and add drama. It can spot light the main subject making it pop from the environment.
I will be posting more information about using a flash, but there is no way to cover all aspects in a blog. My hope is that this little bit of information will cause you to try some new things, experiment, and explore. We only learn if we try.
I will send out emails as I post new information. Do not fret if you do not have an external flash. There are ways to make an on camera flash better.
The challenge: Experiment with using any form of artificial light to capture a photograph. Most will be in the form of a flash, but other sources of light are: an iPhone, iPad, flashlight, candle, incandescent, tungsten, florescent, glow sticks, and street light. I am sure I have left some out, but you get the idea
Rules:
1. Photos must be taken from August 21- September 18...in other words, no archives.
2. Submit no more than 3 photos in any format, or size.
3. If you have done some special post processing...explain.
4. Know your aperture, shutter speed, and ISO.
5. Have fun.
I hope we have a lot of participants in the challenge.
Here are some examples to help you get your creative juices flowing.
Photos taken with on camera flash...
Photo taken with off camera flash...
Photo taken with off camera flash, sort of back and side light.
 |
| Photo taken by Rey Berrones using my camera...so my name on the bottom of the photo is not correct...sorry about the over sight. |
I think this called parabolic lighting...
Constant florescent, and candle lighting...
Lighting from an iPad...
Off camera lighting...creative, and mood...
Off camera lighting with gels...
I hope these photos give you some great ideas. Several years ago, Rey did a workshop with colored gels...get them out, put them on your flash, and see how they can enhance your pictures. This is a month for you to try out, and learn a little bit about flash photography. Go out an get clicking.
Thursday, July 17, 2014
August photo challenge...
"Photographers who use and exploit light are not gifted! They have simply learned about light and have, thereby, become motivated to put themselves in a position to receive the gifts that the 'right' light has to offer." -Bryan Peterson
August's photo challenge is an experiment in the changes of light during different times of the day. Most of us know the best times for photographing a subject where warmth, texture, and depth are revealed, is early in the morning, or late afternoon/early evening. We know it, but have you seen it in your own pictures. Well, now you have an opportunity to experience what photographs taken at different times of day will do to make, or break your photos. I recently attended a workshop on photographing HS seniors. We had the opportunity to watch, and experience different photographers. Of particular interest to me, were the photographers from Arizona, California, and Nevada. They all said, because they were in states with intense sun, they had to learn how to work in all kinds of light...even the harsh light in the middle of the day. Would you know how to take a great picture no matter the lighting situation. Then if you do have a choice, when would you photograph? Do you like the morning light, or the late afternoon, or early night? Would you be able to express why you prefer a certain light? After you do this challenge you will know, and know why you like it.
The Challenge:
Choose a subject to photograph at 3 to 4 different times each day. Keep the framing, and point of view the same. In other words, use the same subject, same location...photograph at different times of the day.
Try to shoot one in the morning, afternoon, and evening. You will be amazed at how your photo changes.
Note the following:
1. Does the light make the subject look better, or worse?
2. How does light from different times of day change the mood of the image?
3. Do you notice more detail, or texture at a particular time of day?
4. How does the color of the light compare at different times...does one seem warmer (more golden), cooler (blue), or white? What kind of light do you like the most?
Extra Challenge:
This challenge was recommended by Bryan Peterson in his book, Understanding Exposure.
"You can do one of the best exercises I know near your home, whether you live in the country or the city, in a house or an apartment. Select any subject-for example, the houses and trees that line your street, or the nearby city skyline. If you live in the country, in the mountains, or at the beach, choose a large and expansive composition. Over the course of the next twelve months, document the changing seasons and the continuously shifting angles of the light throughout the year. Take several pictures a week, shooting to the south, north, east, and west, and in the early morning, midday, and late afternoon light. Since this is an exercise, don't concern yourself with making a compelling composition. At the end of twelve months, with your efforts spread before you, you'll have amassed a knowledge and insight about light that few professionals-and amateurs- possess."
I saw a cute blog where the mom chose to photograph her two children in the exact same spot on the exact day of every month. Each month she posted her project on her blog, and for the month of December she had all twelve in a collage. It was cute, as well as interesting. I wish I could remember where I came across it, but I cannot. It's the hair dye, you know!
Here are some examples of photographs at different times of the day. Photographs are from Peter West Carey.


Same rules apply for this challenge as it has in the past. For those unfamiliar, please refer to past postings. I cannot wait to see what you photograph, and what you learn.
August's photo challenge is an experiment in the changes of light during different times of the day. Most of us know the best times for photographing a subject where warmth, texture, and depth are revealed, is early in the morning, or late afternoon/early evening. We know it, but have you seen it in your own pictures. Well, now you have an opportunity to experience what photographs taken at different times of day will do to make, or break your photos. I recently attended a workshop on photographing HS seniors. We had the opportunity to watch, and experience different photographers. Of particular interest to me, were the photographers from Arizona, California, and Nevada. They all said, because they were in states with intense sun, they had to learn how to work in all kinds of light...even the harsh light in the middle of the day. Would you know how to take a great picture no matter the lighting situation. Then if you do have a choice, when would you photograph? Do you like the morning light, or the late afternoon, or early night? Would you be able to express why you prefer a certain light? After you do this challenge you will know, and know why you like it.
The Challenge:
Choose a subject to photograph at 3 to 4 different times each day. Keep the framing, and point of view the same. In other words, use the same subject, same location...photograph at different times of the day.
Try to shoot one in the morning, afternoon, and evening. You will be amazed at how your photo changes.
Note the following:
1. Does the light make the subject look better, or worse?
2. How does light from different times of day change the mood of the image?
3. Do you notice more detail, or texture at a particular time of day?
4. How does the color of the light compare at different times...does one seem warmer (more golden), cooler (blue), or white? What kind of light do you like the most?
Extra Challenge:
This challenge was recommended by Bryan Peterson in his book, Understanding Exposure.
"You can do one of the best exercises I know near your home, whether you live in the country or the city, in a house or an apartment. Select any subject-for example, the houses and trees that line your street, or the nearby city skyline. If you live in the country, in the mountains, or at the beach, choose a large and expansive composition. Over the course of the next twelve months, document the changing seasons and the continuously shifting angles of the light throughout the year. Take several pictures a week, shooting to the south, north, east, and west, and in the early morning, midday, and late afternoon light. Since this is an exercise, don't concern yourself with making a compelling composition. At the end of twelve months, with your efforts spread before you, you'll have amassed a knowledge and insight about light that few professionals-and amateurs- possess."
I saw a cute blog where the mom chose to photograph her two children in the exact same spot on the exact day of every month. Each month she posted her project on her blog, and for the month of December she had all twelve in a collage. It was cute, as well as interesting. I wish I could remember where I came across it, but I cannot. It's the hair dye, you know!
Here are some examples of photographs at different times of the day. Photographs are from Peter West Carey.
Same rules apply for this challenge as it has in the past. For those unfamiliar, please refer to past postings. I cannot wait to see what you photograph, and what you learn.
Get clicking!
Thursday, July 10, 2014
Pictures from our June challenge...
Hmmm. I found this in my draft folder, so I do not know if it ever got published. If it did, then there will be two. I think the photos are amazing. This was from our June challenge last year. I apologize if I already posted it.
"I thought I made a mistake once, but it turned out to be a creative moment." -Scott Fleming
Oh my goodness! I cannot believe how creative you all are! The challenge pictures are so fantastic. I cannot wait to see everyone's in August. It is not too late to get into the challenge. Start now!
Here are some that Rey Berrones sent. I do not know if he took them, or Kelli took them, or they are a combination there of. Enjoy!
"I thought I made a mistake once, but it turned out to be a creative moment." -Scott Fleming
Oh my goodness! I cannot believe how creative you all are! The challenge pictures are so fantastic. I cannot wait to see everyone's in August. It is not too late to get into the challenge. Start now!
Here are some that Rey Berrones sent. I do not know if he took them, or Kelli took them, or they are a combination there of. Enjoy!
 |
| Day 10: Animal |
 |
| Day 11: Silhouette |
 |
| Day 12: Sun Flare |
 |
| Day 13: Reminder of childhood |
 |
| Day 14: Action |
 |
| Day 15: something red |
 |
| Day 16: Father |
 |
| Day 17: Mason Jar |
 |
| Day 18: Bokeh |
 |
| Day 19: Eyes |
 |
| Day 20: Water |
 |
| Day 21: upclose |
 |
| Day 22: Landscape |
 |
| Day 23: black and white |
Not our ordinary photos...tutorial how to edit Milky Way photos...
"Twelve significant photographs in one year is a good crop." -Ansel Adams
Since we had a nice number of individuals who participated in the Milky Way and star shoot, I thought I would share a tutorial on how to edit the photos. The tutorial uses Lightroom, and the full version of photoshop. Even those without the full photoshop will find his techniques amazing. The tutorial is about 23 minutes.
https://www.youtube.com/watch?v=DKyaoVIA8Oo&list=PLJ6FIlZVNbQOYg4WXQN7ZpYK3FEH1GVco
Bill Flynt recently was at the Albuquerque Zoo where he captured some of the animals that live there. I thought these pictures would be nice to share since these are very different from Bill's normal photos.


Since we had a nice number of individuals who participated in the Milky Way and star shoot, I thought I would share a tutorial on how to edit the photos. The tutorial uses Lightroom, and the full version of photoshop. Even those without the full photoshop will find his techniques amazing. The tutorial is about 23 minutes.
https://www.youtube.com/watch?v=DKyaoVIA8Oo&list=PLJ6FIlZVNbQOYg4WXQN7ZpYK3FEH1GVco
Bill Flynt recently was at the Albuquerque Zoo where he captured some of the animals that live there. I thought these pictures would be nice to share since these are very different from Bill's normal photos.
Sunday, July 6, 2014
Some photos...
Look at what we have been photographing...
 |
| Photo by Bill Flynt |
 |
| Photo by James Tarlton...near Lincoln |
 |
| Photo by Sue Heaton...she has captured blue light and fireworks. Beautiful! |
 |
| Photo by Cliff Powell: Male Swift Set Wing 150mm, f/18, 1/320, ISO 500 |
 |
| Photo by Cliff Powell: Female Blue Dancer 150mm, f/11, 1/500, ISO 500 |
 |
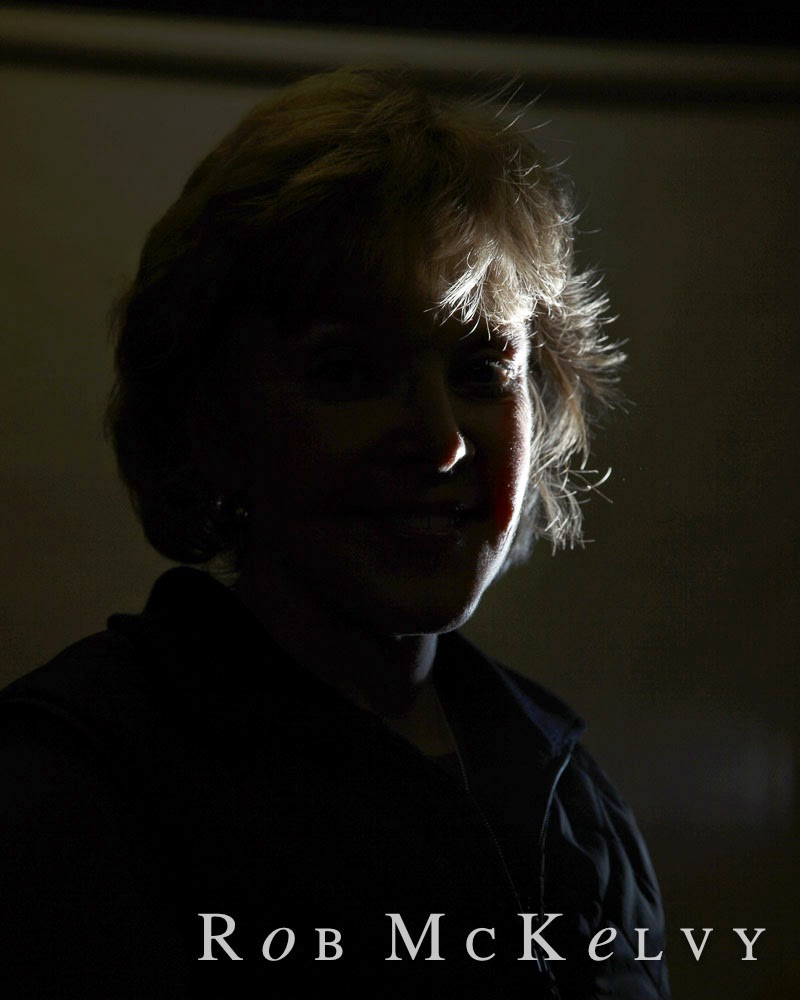
| Photo by Rob McKelvy |
Saturday, June 28, 2014
Welcome little one...
"Making a decision to have a child is momentous. It is to decide forever to have your heart go walking outside your body." -Elizabeth Stone
Rey and Kelly Berrones have a new member in their family. Little Shelby Ryan made her appearance on June 26. I must say Kelly and Rey looked like they were in much need of some sleep, but they both had the biggest smiles on their faces. The baby was sleeping very well, unlike her parents. She is a beautiful little princess. I was told how much she weighed, but it slips my mind now. It was 6 pounds, and something ounces. Sorry, I cannot remember...which seems to be happening to me quite a lot lately. Not remembering that is. I blame it on the fact that I dye my hair. All those chemicals are doing something to my brain.
Anyway, welcome to the world Shelby. I am sure we will get to see her at some of our club meetings.
Rey and Kelly Berrones have a new member in their family. Little Shelby Ryan made her appearance on June 26. I must say Kelly and Rey looked like they were in much need of some sleep, but they both had the biggest smiles on their faces. The baby was sleeping very well, unlike her parents. She is a beautiful little princess. I was told how much she weighed, but it slips my mind now. It was 6 pounds, and something ounces. Sorry, I cannot remember...which seems to be happening to me quite a lot lately. Not remembering that is. I blame it on the fact that I dye my hair. All those chemicals are doing something to my brain.
Anyway, welcome to the world Shelby. I am sure we will get to see her at some of our club meetings.
 |
| Shelby Ryan |
Subscribe to:
Posts (Atom)